Japanese Passbook Data Entry
Mistakes That Break Your Kakeibo
On Yahoo Chiebukuro (Yahoo 知恵袋), Japan's largest Q&A platform, the same question keeps surfacing in different forms: "No matter how carefully I enter my passbook data, my balance never matches." The people asking are not careless. They use paper ledgers. They switch to apps. They try the envelope system. They double-check every row. And the number at the bottom of the column is still wrong. What makes a Japanese bank passbook (通帳, tsūchō) uniquely error-prone is the structure of the document rather than the act of typing: a five-column ATM-printed ledger where every line inherits its running balance (差引残高) from the line above, where era years require arithmetic to convert, and where the bank occasionally consolidates transactions into a single summary line without warning.
Key Takeaways
- That feeling of rechecking 340 passbook rows at 11pm because the balance is ¥11,670 off: the mistake is not in your typing. The document is built to hide errors inside a running balance that looks correct on every line.
- Unlike a bank statement with monthly checkpoints, a passbook chains every row together, so you cannot verify line 50 without verifying lines 1 through 49. One invisible error forces you to re-enter the entire booklet from scratch.
- Before typing anything, scan each page for the three traps that make manual passbook entry structurally unwinnable: consolidation lines that silently double-count transactions, era arithmetic that shifts entries into the wrong tax year, and correction seals smaller than a ¥10 coin that quietly override the printed text beneath them.
What follows are five passbook-specific data entry errors. They exist because of the format, not because the person typing made a typo. If you recognise any of them, you are not careless. You are working with a document designed for a printer, not a spreadsheet.
The Consolidation Entry (合計記帳) Trap: When a Bank Summary Line Creates Phantom Duplicates
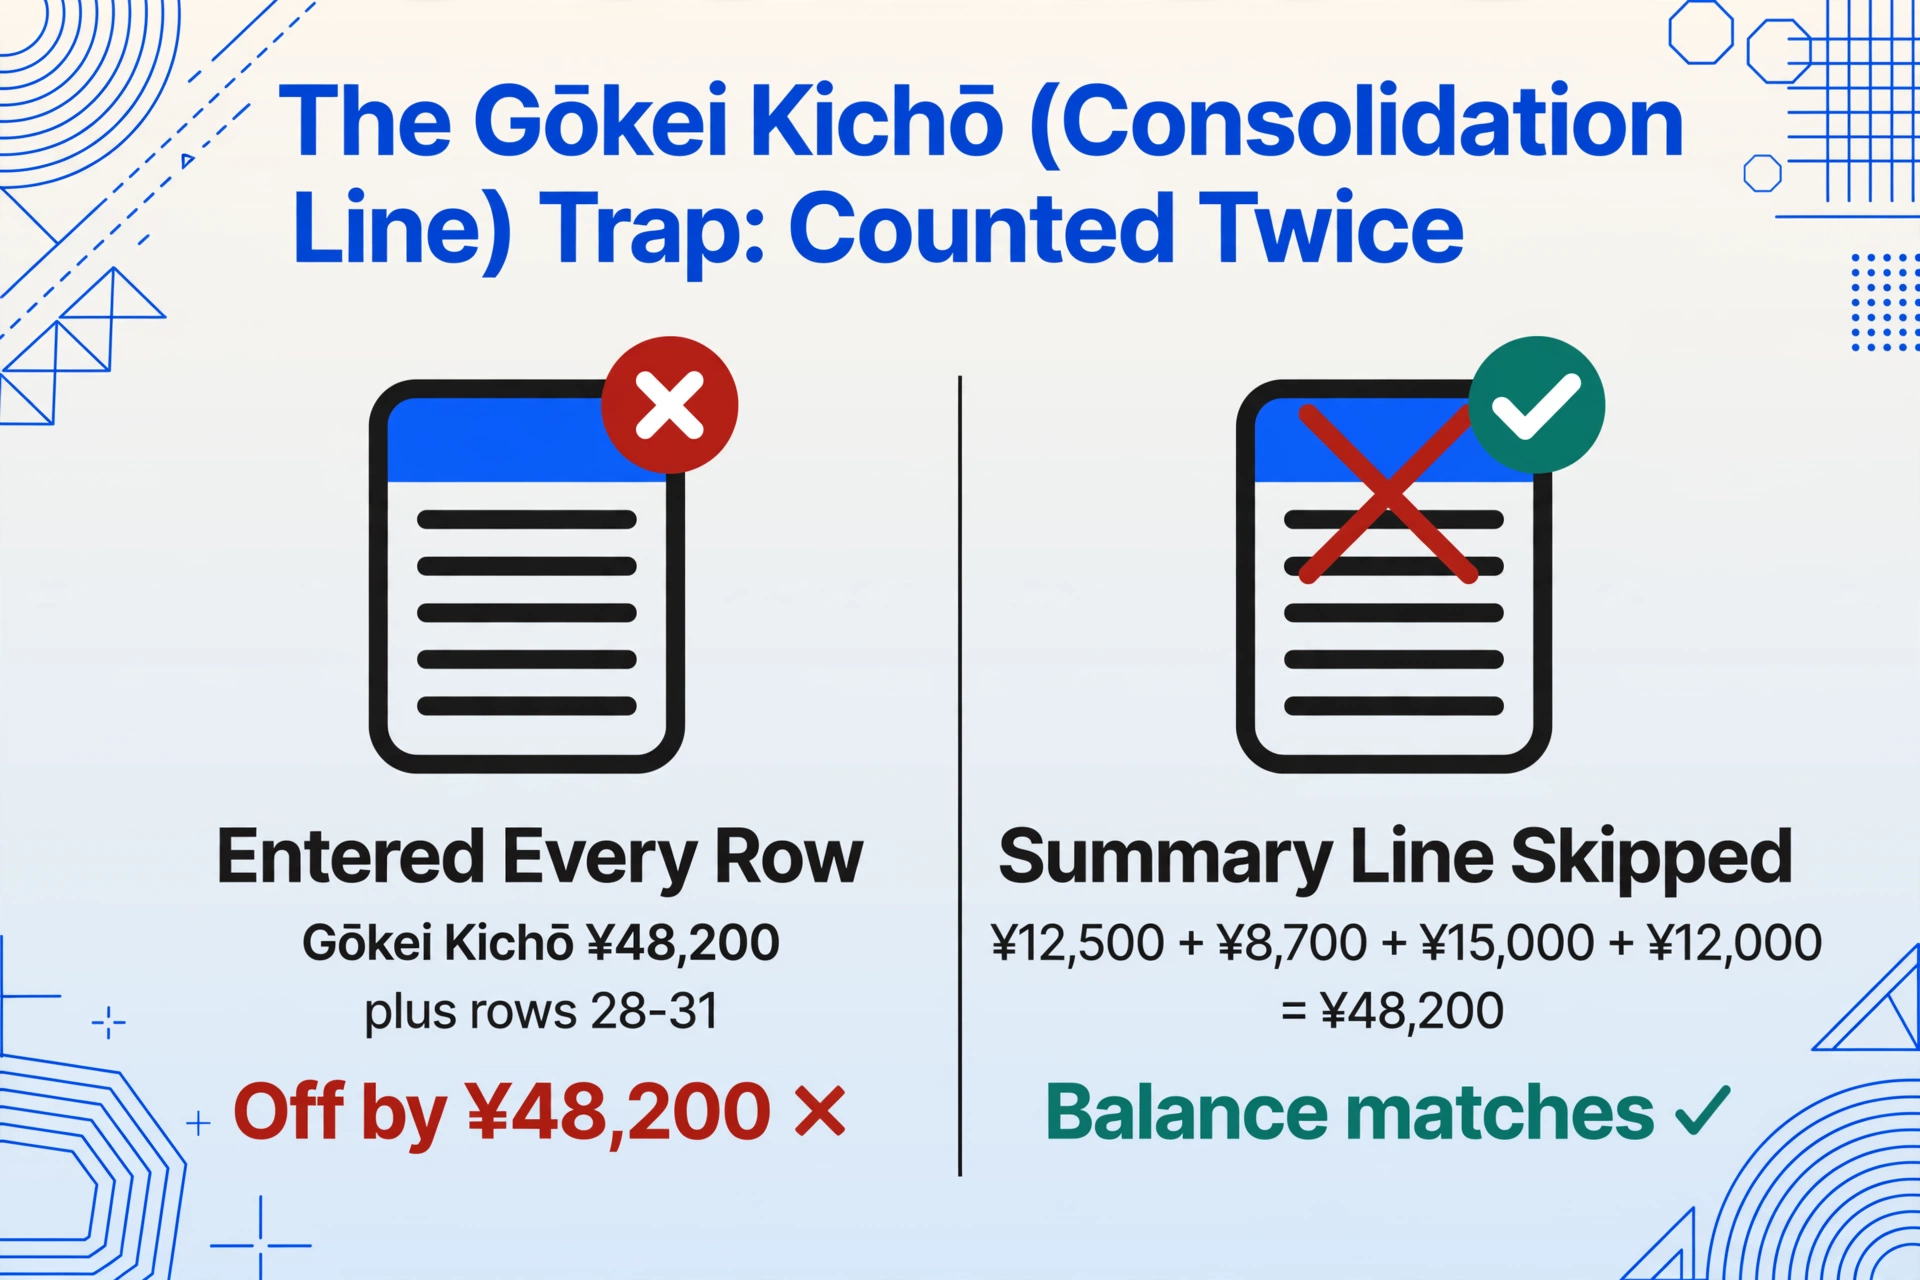
What it looks like. You are entering transaction lines from a passbook page. Row 27 shows a withdrawal of ¥48,200 with the description code Consolidation Entry, or Unposted-Transactions Total (未記帳分合算) depending on the bank. Row 28 through 31 show individual transactions: ¥12,500, ¥8,700, ¥15,000, ¥12,000. You enter all five rows. Your balance is now off by ¥48,200, exactly the amount of row 27.
What actually happened. When a passbook goes too long without being updated at an ATM, unprinted transactions accumulate. MUFG Bank's policy triggers a consolidation entry when unprinted entries exceed a threshold on specific dates (May and November each year). Hiroshima Bank uses a 48-entry threshold. Japan Post Bank (ゆうちょ銀行) consolidates at 30 unprinted entries, printing "consolidated total" (合算) and a single combined total. The bank prints one summary line representing the sum of all skipped transactions, then prints the individual transactions as well. The summary line is not an additional transaction. It is a label.
Enter both, and you have counted the same money twice: once in aggregate, once individually. The arithmetic is precise. If your discrepancy after entering a page equals exactly one line's withdrawal or deposit amount, check whether that line is a consolidation entry, an unposted-transactions total, or a consolidated total.
The fix. Scan each passbook page for consolidation markers before entering any individual rows. Consolidation-entry lines appear at page breaks or section boundaries, often with a blank description column immediately preceding them. Skip these lines entirely; the individual transactions that follow are the real data. If you are processing multiple years of passbook pages, the risk is highest at page transitions where a consolidation period spans the boundary between an old booklet and its replacement, the carry-forward (繰越).
Wrong Era Date Conversion: How a One-Year Offset Sends Transactions to the Wrong Tax Year
What it looks like. You read an era date written as Reiwa 6, July 15 (令和6年7月15日) on a passbook line. You convert it to 2025/07/15 in your spreadsheet. Your accountant calls in February and asks why ¥380,000 in December revenue is sitting in the wrong fiscal year.
What actually happened. The Japanese era year system is arithmetic, but the arithmetic has a trap. Reiwa began on May 1, 2019. The conversion formula is:
Reiwa year N = N − 1 + 2019
Passbook notation: Reiwa year N (令和 N 年)
Reiwa 1 (令和元年) started in May 2019; there is no Reiwa 0. So Reiwa 6 = 6 − 1 + 2019 = 2024, not 2025. The most common error is adding the era year to the year the era began (2019) rather than to the year before it (2018), which shifts the result by one. The same mistake moves every later date: Reiwa 7 (令和7年) lands in 2026 in your spreadsheet when it should be 2025.
The correct formula for each era in active use on Japanese passbooks:
| Era (年号) | Start Date | Formula | Example: Year 6 |
|---|---|---|---|
| Reiwa (令和) | 2019/05/01 | N − 1 + 2019 | 2024 |
| Heisei (平成) | 1989/01/08 | N − 1 + 1989 | 1994 |
| Shōwa (昭和) | 1926/12/25 | N − 1 + 1926 | 1931 |
The problem gets worse when a single passbook page spans an era boundary. A line dated Heisei 31 (平成31年4月20日) sits directly above a line dated Reiwa 1 (令和元年5月10日). Heisei 31 is Reiwa 1: April 30, 2019 was the last day of Heisei, and May 1, 2019 was the first day of Reiwa. If your extraction treats both as "year 1 minus a constant" from the same era, one of them will be off by years. Passbooks printed during the 2019 transition, especially at regional banks and Japan Post (ゆうちょ銀行), still contain these era-boundary rows.
The fix. Never convert era years mentally. Use a lookup table. If you use extraction software, verify that the tool handles multi-era passbook pages correctly. For blue-form tax filing (青色申告), a single transaction landing in the wrong fiscal year means your beginning balance (期首残高) for that year is wrong, and the error propagates through every subsequent entry in the accounting software.
Description Code (摘要) Misinterpretation: When Salary and Salary Transfer Tell Different Stories
What it looks like. You see Salary (給与) in the description code column and categorise it as salary income. The category is right for a personal kakeibo but completely wrong for a business ledger where Salary Transfer (給与振替) represents an internal transfer between accounts, not income at all.
What actually happened. Japanese bank passbook description codes are telegraphic: compressed strings of kanji and katakana that pack a transaction type, a counterparty identifier, and sometimes a branch code into a single field as short as 10 characters. The same root word can mean different things depending on suffix and context:
| Description Code | Reading | Meaning | Correct Accounting Treatment |
|---|---|---|---|
| Salary (給与) | kyūyo | Salary deposit, income from employer | Revenue (売上) or salary income |
| Salary Transfer (給与振替) | kyūyo furikae | Salary transfer, moving money from one own account to another | Inter-account transfer, not income and not expense |
| Incoming Transfer (振込) | furikomi | Incoming bank transfer from third party | Revenue or receivable settlement |
| Account Transfer (振替) | furikae | Internal transfer between own accounts | Offsetting entry, no P&L impact |
| Interest (利子) | rishi | Interest payment, a small deposit | Non-operating income (受取利息) |
Move from one bank to another and the same transaction type may use different codes entirely. SMBC (三井住友銀行) abbreviates where MUFG (三菱UFJ銀行) spells out. Mizuho (みずほ銀行) uses full-width characters where Resona (りそな銀行) uses half-width. A template-based OCR tool trained on MUFG passbook samples will misread SMBC descriptions because it learned character patterns that do not exist on the SMBC page.
The fix. Treat the description code as a classification task: ask what type of transaction this is, not what characters it contains. For business accounting, the correct mapping is: a salary transfer means a transfer rather than income; an incoming transfer from a company name is revenue; an incoming transfer from a personal name is likely owner's capital (事業主借). If you are importing into Yayoi (弥生) or freee, the description code determines which account the entry lands in. Getting this wrong at the extraction stage means correcting it manually in the accounting software row by row.
The Running Balance Cascade: One Wrong Digit on Page 3, 280 Rows of Drift
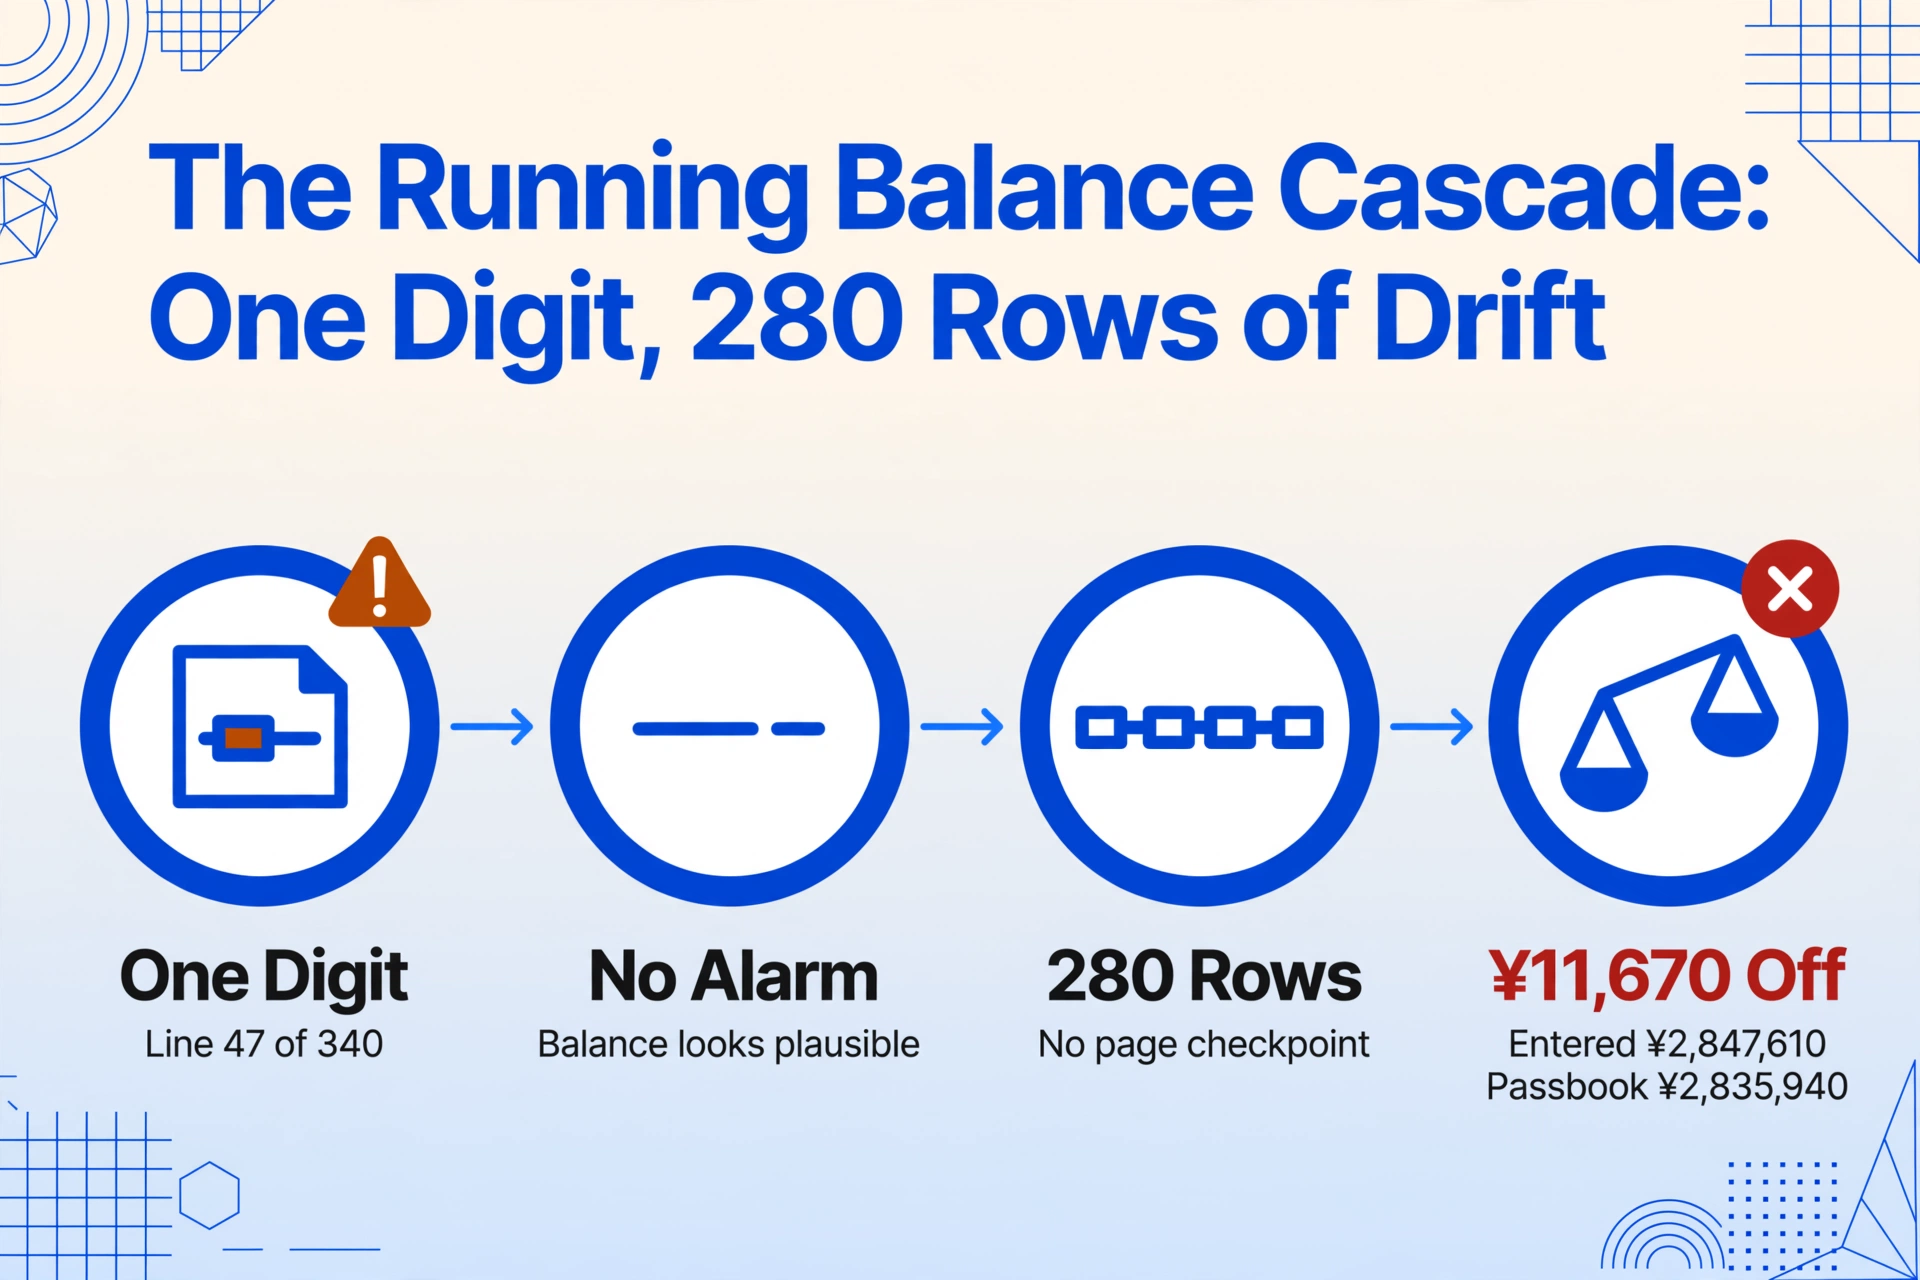
What it looks like. You have been entering passbook data for three hours. The spending ledger for 2025 looks complete: 340 rows, every entry accounted for, a balance that ends at ¥2,847,610. You open your accounting software, enter the December 31 bank balance from the actual passbook: ¥2,835,940. The difference is ¥11,670. You cannot find it.
What actually happened. This is the defining structural vulnerability of passbook data entry. Unlike a UK bank statement, where each month's page is self-contained with its own opening and closing balance, the Japanese passbook is a single continuous chain. Every line's balance, the running balance (差引残高), is calculated by adding the deposit or subtracting the withdrawal from the previous line's balance. A single mistyped figure on line 47 of a MUFG passbook (¥88,170 instead of ¥98,500) creates no visible discrepancy on that line. The balance after line 47 is ¥88,170 instead of ¥98,500, a ¥10,330 gap, but looking at one line in isolation, ¥88,170 looks perfectly plausible. It could be the correct balance. It is not until 280 rows later, when the current page's printed balance should match the running balance on your spreadsheet, that the drift becomes visible, and by then you have 280 entries to re-check.
The hard part is verification, not typing. In a statement-based system, you verify each month independently. In a passbook, you cannot verify line 50 without verifying lines 1 through 49, which means the only practical verification strategy is entering the entire passbook and comparing the final balance, at which point any error requires re-entering everything.
On Zeiri4 (税理士ドットコム), one business owner in their third year of blue-form filing (青色申告) described the exact scenario: three years of passbook data entered, the balance never reconciled, the discrepancy now too entangled to untangle. The accountant's answer was pragmatic: set the current period's beginning balance to match the passbook, write off the accumulated gap as an adjustment, and start fresh. But that adjustment is real money (¥11,670, ¥48,000, sometimes more) that disappears from the books because the data entry was never verified at the source.
The fix. Spot-check the running balance at page breaks. After entering all transactions on one page, compare your spreadsheet's balance for the last row to the printed running balance on the passbook page. If they differ, the error is on that page, not somewhere across 340 rows. This reduces a three-hour re-check to a two-minute one. For batch processing across multiple years of passbook pages, processing all pages in a single session with automatic balance verification eliminates the manual cross-check entirely.
The Handwritten Correction Nobody Noticed: When the Teller Fixed It but the Spreadsheet Didn't
What it looks like. You are transcribing a passbook page. Line 53 shows a printed withdrawal of ¥52,000. Next to it, in ballpoint pen, a bank teller has written ¥25,000 and stamped it with the branch's correction seal (訂正印). You enter ¥52,000, the printed number. Six months later, your bank balance disagrees with your books by ¥27,000.
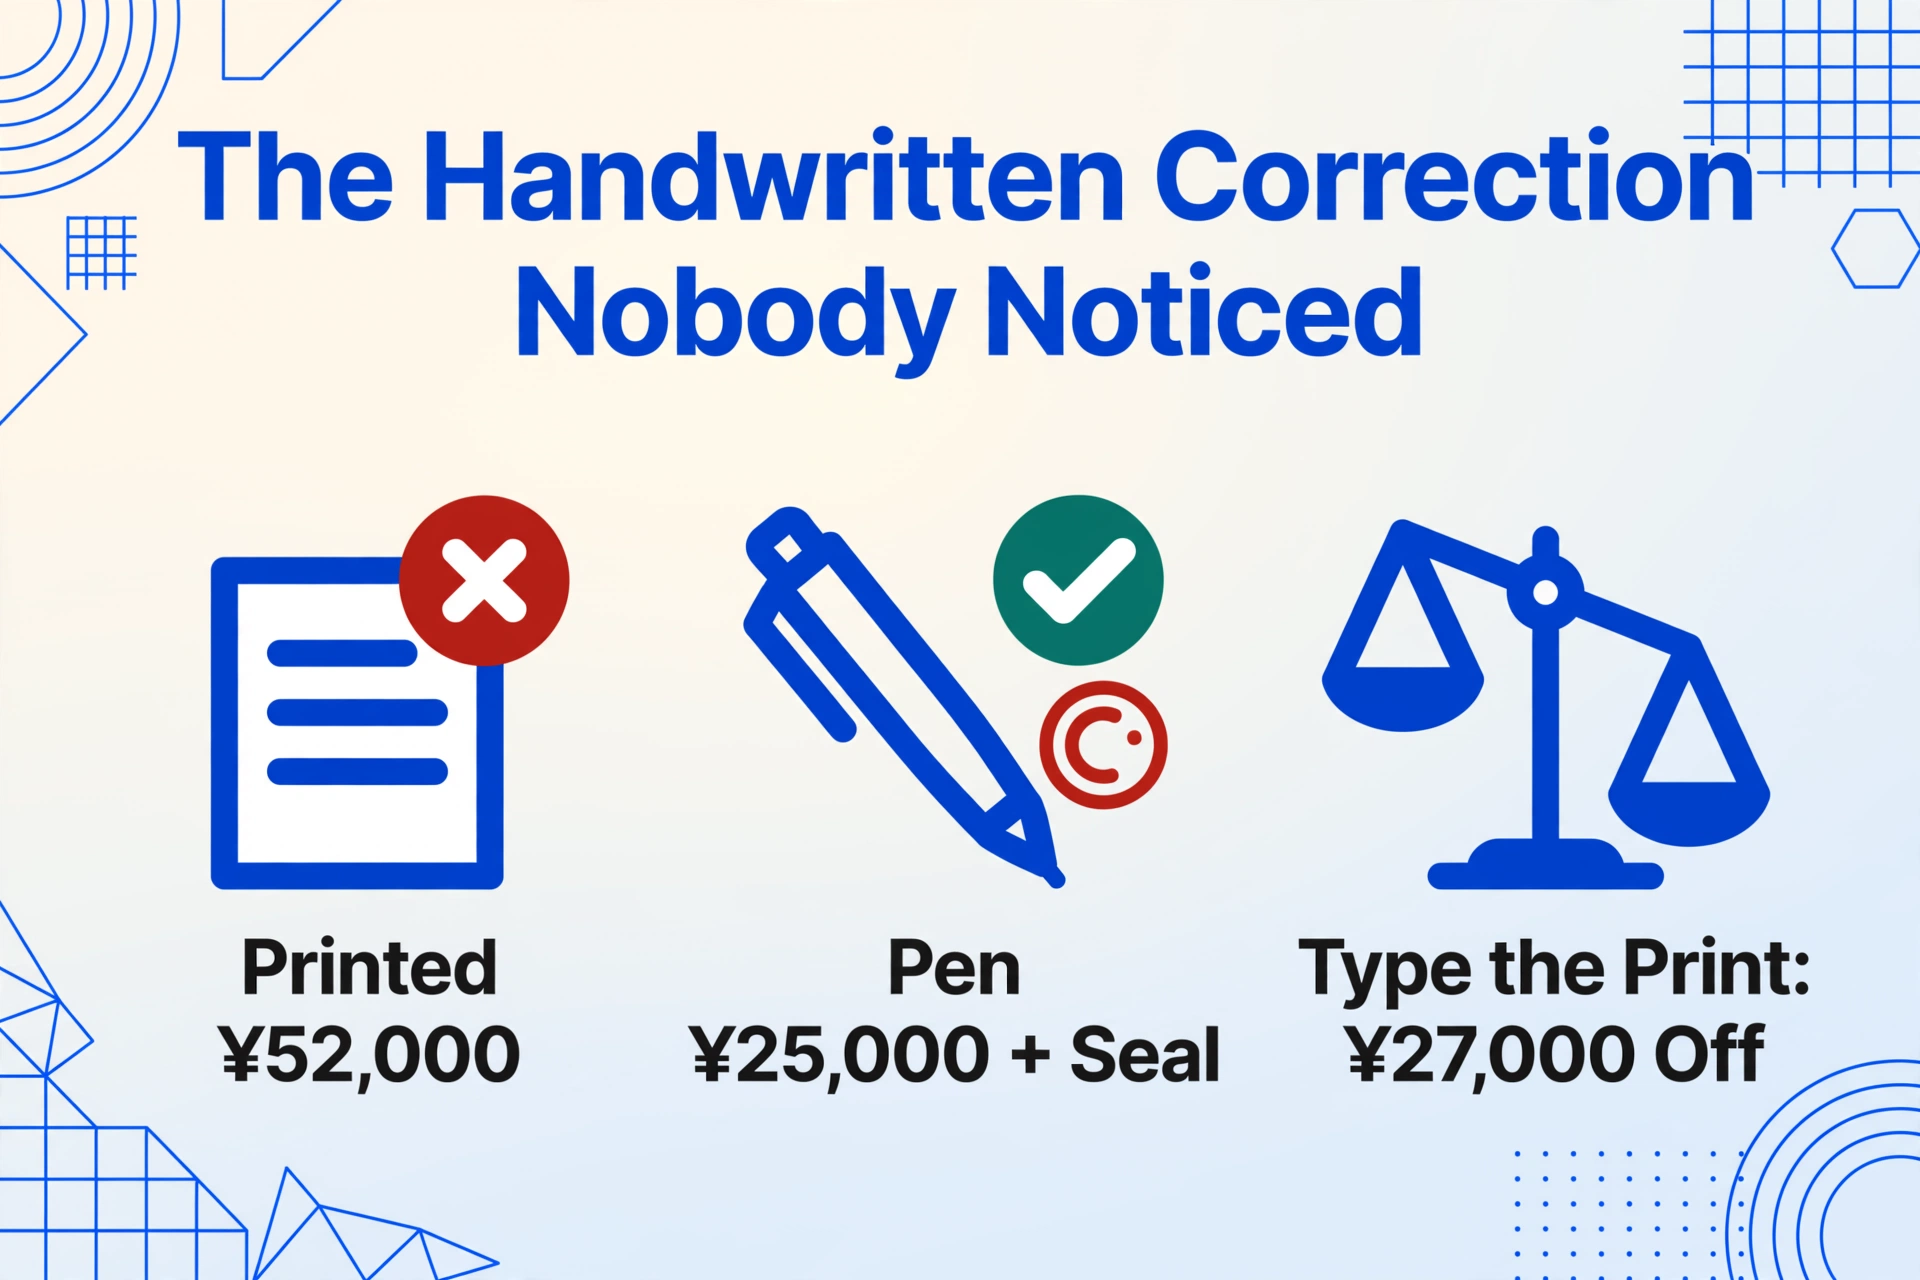
What actually happened. Bank teller corrections on magnetic passbooks (磁気通帳) are rare but real. When an ATM misprints (a known issue with older dot-matrix print heads nearing replacement, or with a worn magnetic stripe (磁気ストライプ) that makes the ATM read the wrong page), a teller at the counter will hand-write the correction, stamp it with the bank's official correction seal, and initial it. The handwritten entry is the authoritative one. The printed one is the error.
This is the hardest error to catch because it violates the mental model users bring to data entry: "read what's printed, type what's printed." The correction is in handwriting, which the brain naturally categorises as annotation rather than data. And the teller's stamp is small: a 10mm circle in red ink, easily overlooked on a page of black dot-matrix text.
The risk is highest with older passbooks from regional banks (地方銀行) and shinkin banks (信用金庫), where ATM maintenance cycles are longer and teller corrections are more common. If a passbook is updated at a branch counter rather than an ATM (common during business hours when the passbook is already out for a deposit), the teller may notice and correct a misprint before returning it.
The fix. Before entering any passbook page, scan it for red ink, the colour of correction seals. Any line with a red stamp gets the handwritten value, not the printed one. For extraction tools, semantic extraction that reads the entire page context rather than character-by-character OCR is less likely to skip areas flagged with visual markers like stamps and annotations.
How to Catch These Errors Before Tax Season and Before They Hit the Ledger
These five errors share a root cause: the passbook was designed for a printer that prints one unified chain of transactions, and any manual transcription breaks that chain at multiple points: the entry, the verification, the era conversion, the description interpretation, and the correction handling. The fix is not to be more careful. It is to move the data extraction to a process that treats the passbook as a structured document whose integrity depends on every link in the chain being read correctly.
Three practical steps that prevent all five error types:
Verify the running balance at every page boundary.
The printed running balance (差引残高) at the bottom of each passbook page is your checkpoint. If your entered balance for the last row on page 2 matches the printed balance, every row on pages 1 and 2 is correct. If it does not, the error is on page 2, not buried somewhere across the entire passbook. This eliminates the cascade problem at the cost of one comparison per page.
Use a fixed era conversion table, not mental arithmetic.
Print the three-line Reiwa/Heisei/Shōwa formula table above. Tape it to your monitor. For passbooks that cross the 2019 era boundary, verify that dates in April and May of Heisei 31 / Reiwa 1 are assigned to the correct calendar year, especially if the passbook covers transactions from both eras on the same page.
Scan for consolidation entries and correction seals before entering anything.
A 10-second visual scan of each page, looking for the consolidation markers (合計 / 合算) at the left margin and red stamps anywhere on the page, eliminates the two most invisible error sources before they enter your spreadsheet.
For anyone processing passbook data at scale (three years of pages, multiple bank accounts, 12-month spending ledgers), these manual checks work but do not scale. The alternative is extraction that reads the passbook page as a whole: recognising consolidation-entry lines as non-transaction rows, converting era dates using the correct formula, classifying description codes by meaning rather than character match, and tracing each extracted value back to the line it came from. In the review screen, hover a cell in the result table and the matching row on the passbook page highlights, so a value that does not match its source is visible during extraction instead of after the balance fails to reconcile. Turn on auto-annotate and that mapping is generated the moment processing finishes. This is the difference between a manual entry workflow that costs 80+ hours per tax year and a verification pass that takes minutes.
Files are processed securely and not stored.
FAQ: Japanese Passbook Data Entry Mistakes
My kakeibo balance is off by a small amount every month. Is this a passbook error or a spending tracking error?
If the discrepancy is small and consistent (say ¥500 to ¥2,000 each month), it is more likely a spending tracking gap: unrecorded convenience store withdrawals, ATM fees, or the small ¥1-¥3 interest payments (利子) that banks print. Compare your entered passbook balance against the printed one first. If they match, the gap is in your spending records, not the passbook transcription. If you have not been entering the tiny interest lines, easy to skip because they look like noise, those ¥1-¥3 deposits add up to ¥12-¥36 per year, not ¥6,000-¥24,000. The bigger gap points to a missing withdrawal.
How do I tell a consolidation-entry line (合計記帳) from a normal withdrawal line?
Three visual cues: (1) The description code says consolidation entry, unposted-transactions total, or a consolidated total, never a normal transaction code like an incoming transfer (振込) or salary (給与). (2) The line appears at the start of a new page or immediately after a blank line, never in the middle of a sequence of individual transactions. (3) The amount is typically a round number or a sum that equals the total of the next several individual transactions. Trust the description code: a line reading Total (合計) is not a transaction.
My passbook has Heisei 31 and Reiwa 1 on the same page. How do I handle the era crossover?
Heisei 31 covers January 1 through April 30, 2019. Reiwa 1 covers May 1 through December 31, 2019. Both convert to calendar year 2019, but the month determines which era name appears. A line dated Heisei 31, April 20 (平成31年4月20日) converts to 2019/04/20, and a line dated Reiwa 1, May 10 (令和元年5月10日) converts to 2019/05/10. Same calendar year, different era labels. If your passbook has both on one page, treat them as the same year but use the month as the tiebreaker for sorting. This is most common on passbooks printed in mid-2019 that span the transition, especially at Japan Post Bank, where magnetic passbooks (磁気通帳) printed pre-transition pages alongside post-transition updates.
Do different banks use different description codes for the same transaction type?
Yes. There is no industry-wide standard for passbook description codes. MUFG's code for a domestic bank transfer may differ from Resona's. Regional banks (地方銀行) and shinkin banks (信用金庫) often have their own abbreviated codes that even experienced accountants need a reference sheet to interpret. This is why the extraction approach matters: the semantic interpretation of the description code (is this a salary deposit, a transfer, or an ATM withdrawal?) is more valuable than the raw character string. If your accounting software supports CSV import with category mapping, matching the extracted transaction type to the correct account code is better than matching the raw description text to a fixed list of codes.
How do I verify whether a handwritten correction on my passbook is legitimate?
A legitimate bank teller correction will always have a red correction seal (訂正印), typically a small circular stamp containing the bank's name or branch code. The handwritten amount will be written clearly, often in blue or black ballpoint that contrasts with the dark grey of dot-matrix printing. If there is no stamp, or if the handwriting looks like a personal notation rather than an official correction, treat the printed amount as authoritative and flag the line for manual review. If you are unsure, the bank branch that made the correction can verify it, but this requires a physical visit with the passbook, which few people do for a single line.
Can I import corrected passbook data directly into Yayoi or freee?
Yes. Both Yayoi (弥生) and freee support CSV import for transaction data. The key is getting the data into a format where each row has the correct date (Western calendar), amount, transaction type, and, critically, a verified running balance. Most CSV import failures in Japanese accounting software happen because the imported balance does not match the expected opening balance. If your extracted data's starting balance matches the passbook's printed running balance (差引残高) for that date, the import will succeed. The manual entry approach (typing each row and hoping the balance works out) is what creates the import mismatch in the first place.
The Error You Don't See Is the One That Costs You
Five error types are not the real problem. The errors are invisible in the moment. Unlike a receipt, where a wrong amount is immediately obvious because the total does not match, a passbook mis-entry produces a balance that looks correct: ¥88,170 reads just as plausibly as ¥98,500, and the error surfaces only later, during a reconciliation that most people do once a year, if they do it at all.
This is why the same UK data entry mistakes manifest differently from the Japanese passbook case. P60 payroll mistakes and SA100 self-assessment errors are caught by HMRC's cross-referencing: the tax authority compares your submission against employer filings and flags the discrepancy. The Japanese passbook has no external cross-reference. The only authority that knows your correct balance is the bank, and the bank printed it on the passbook page you are transcribing. The verification loop is self-contained: the source document is its own reference.
That self-contained loop is what makes passbook extraction different from any other document type. The data is there, printed clearly, on a document designed for machine reading by an ATM. The errors happen in the gap between the printed page and the spreadsheet, and that gap is what extraction eliminates.