How to Extract Shipping Label & Manifest Data
to Excel for Shipment Tracking
Every carrier portal will show you one package at a time. The moment you need to see 40 shipments across FedEx, UPS, and USPS in a single sortable view — which carrier is late this week, which lane keeps missing its window — that view has to live somewhere you control, and for most logistics teams that somewhere is a spreadsheet someone fills in by hand. The labels and manifests already contain every field that tracking table needs. The work is getting them out of the documents and into rows without typing them.

Key Takeaways
- A 300-row carrier manifest at three minutes per page burns half a day of manual typing before a single tracking number is verified — and a week of labels multiplies that across every shipment.
- A single-digit typo in a 22-digit USPS tracking number makes that package permanently untraceable — and manual entry of tracking numbers is the weakest link in any tracking spreadsheet, not just the slowest one.
- Every field your tracking sheet needs already exists on every label and manifest — define the columns once, and the same column list reads across FedEx, UPS, and USPS labels and manifests in one pass.
Before any tool enters the picture, one distinction decides how you build the spreadsheet: shipping labels and package manifests are structurally different documents, even though they describe the same shipments. A shipping label is the per-package document — one label per box, carrying that box's tracking number, addresses, weight, and service level. A package manifest is the batch summary — one page (or several) listing every piece tendered in a single drop-off, used by USPS and freight carriers to accept a whole trailer or mailbag at once instead of scanning each label individually. Both belong in your tracking table; they just arrive from different sides of the same operation.
What follows is the full workflow for both: what columns your tracking spreadsheet actually needs, how labels and manifests map onto those columns, the extraction steps that skip the typing, and the carrier format rules you should use to sanity-check the output.
What a Shipment Tracking Spreadsheet Actually Needs
A tracking spreadsheet exists to answer three questions at a glance: what's in transit, which carrier is handling it, and when it should arrive. That narrows the columns to a small set that nearly every team ends up with, regardless of industry:
| Column | Where it comes from | Why it matters |
|---|---|---|
| Tracking number | Label barcode area / manifest piece ID column | The lookup key for every carrier portal. A single mistyped digit makes the package untraceable — this is the field worth verifying hardest. |
| Carrier | Label header or manifest title | Enables per-carrier filtering and on-time performance comparison. |
| Service level | Label (Ground, 2-Day, Priority Mail, etc.) | Expected delivery windows and cost tiers live here; a service change explains a date shift before you ask the carrier. |
| Ship date | Label / manifest date field | The anchor for delivery ETA calculations and aging reports. |
| Weight | Label weight block | Feeds freight cost analysis and dimensional-weight checks. |
| Recipient / destination | Label "TO" address block | Resolves "which customer does this belong to" without opening the portal. |
| Reference / PO number | Label reference field or manifest shipper column | The join key back to your order or purchase order data. |
| Status | Added after export (manual or carrier lookup) | Delivered / in transit / exception — the column that makes the sheet a tracking log rather than a shipping log. |
The tracking number is the one column you cannot afford to transcribe wrong — a single-digit typo in a 22-digit USPS number turns the package into a permanent "cannot locate" case. Everything else can be corrected by looking at the label again; a bad tracking number can't even be looked up. That single constraint is why manual entry of tracking numbers is the weakest link in the whole spreadsheet — and the strongest argument for extracting them directly from the document.
Labels vs Manifests: Two Documents, One Spreadsheet
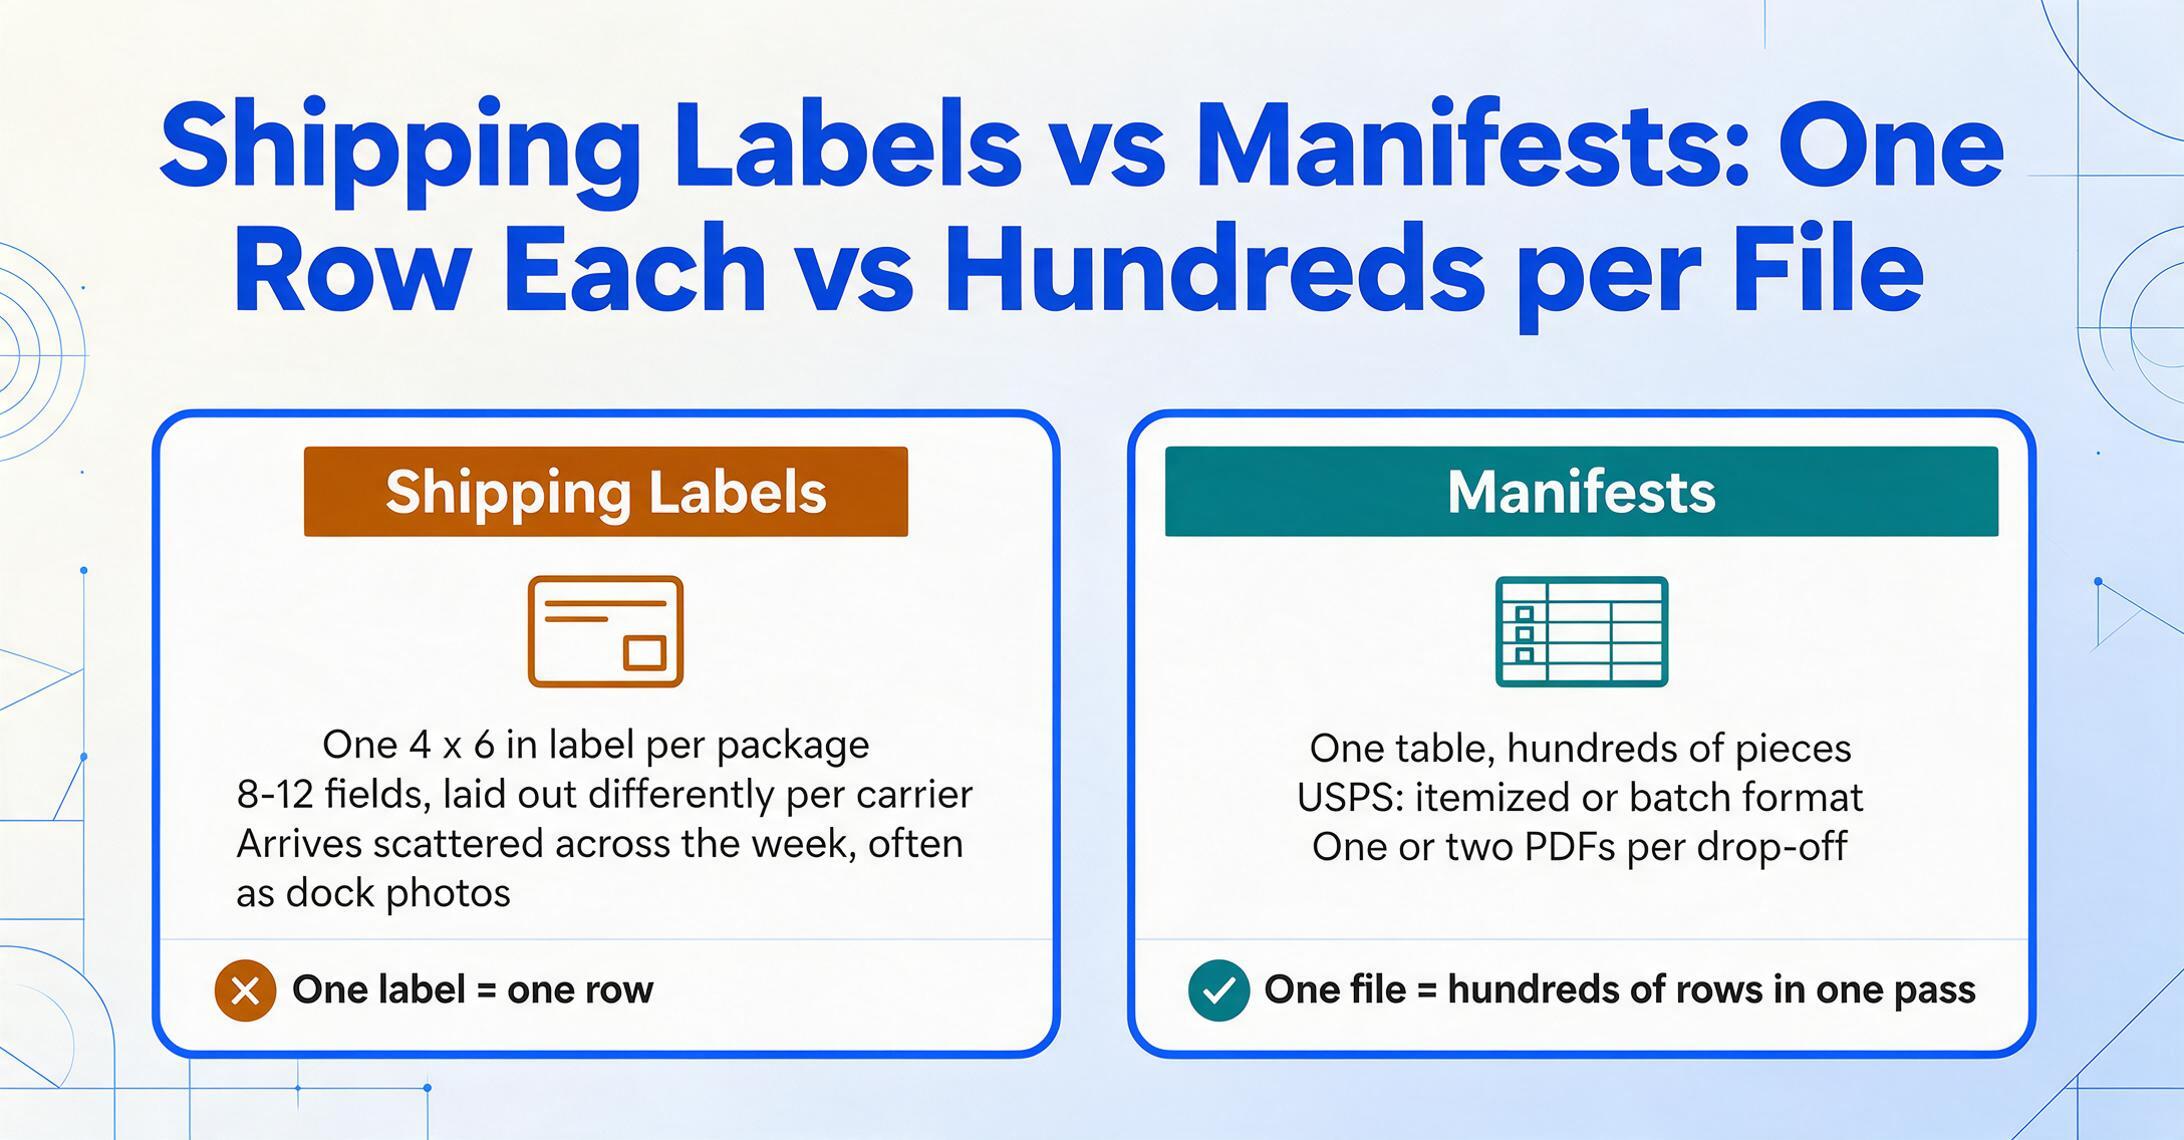
A standard carrier label — FedEx Ground, UPS, USPS Priority — packs 8–12 fields into a 4″ × 6″ thermal label: tracking number, two address blocks, service level, weight, ship date, and reference fields. The fields are laid out differently by every carrier, and the tracking number always sits near the barcode because scanners and humans read the same code.
A manifest, by contrast, is a table. The USPS Manifest Mailing System (governed by the Domestic Mail Manual, section 705, and Publication 401) defines two formats: itemized processing, where every piece is listed individually by unique ID, weight, and postage; and batch processing, where consecutive ID ranges are grouped with a piece count and total postage. Both reduce to the same thing for your spreadsheet: rows. One manifest row for each piece, with the tracking ID, weight, and postage columns pre-aligned by the carrier.
The practical difference: labels arrive scattered across a week's worth of shipments (or as photos from a remote warehouse), while manifests arrive as one or two multi-page PDFs covering everything tendered at a single drop-off. Batch extraction handles both the same way — every file in one pass, every row merging into the same output table — but the manifest scenario is where batch processing pays for itself, because a single document can produce hundreds of rows that would otherwise take an afternoon of typing. For a field-by-field breakdown of where this accuracy holds up and where it doesn't — bordered vs. borderless manifest tables, handwritten annotations, damaged labels — see our guide on what AI can and can't extract from shipping labels and manifests.
The End-to-End Extraction Workflow
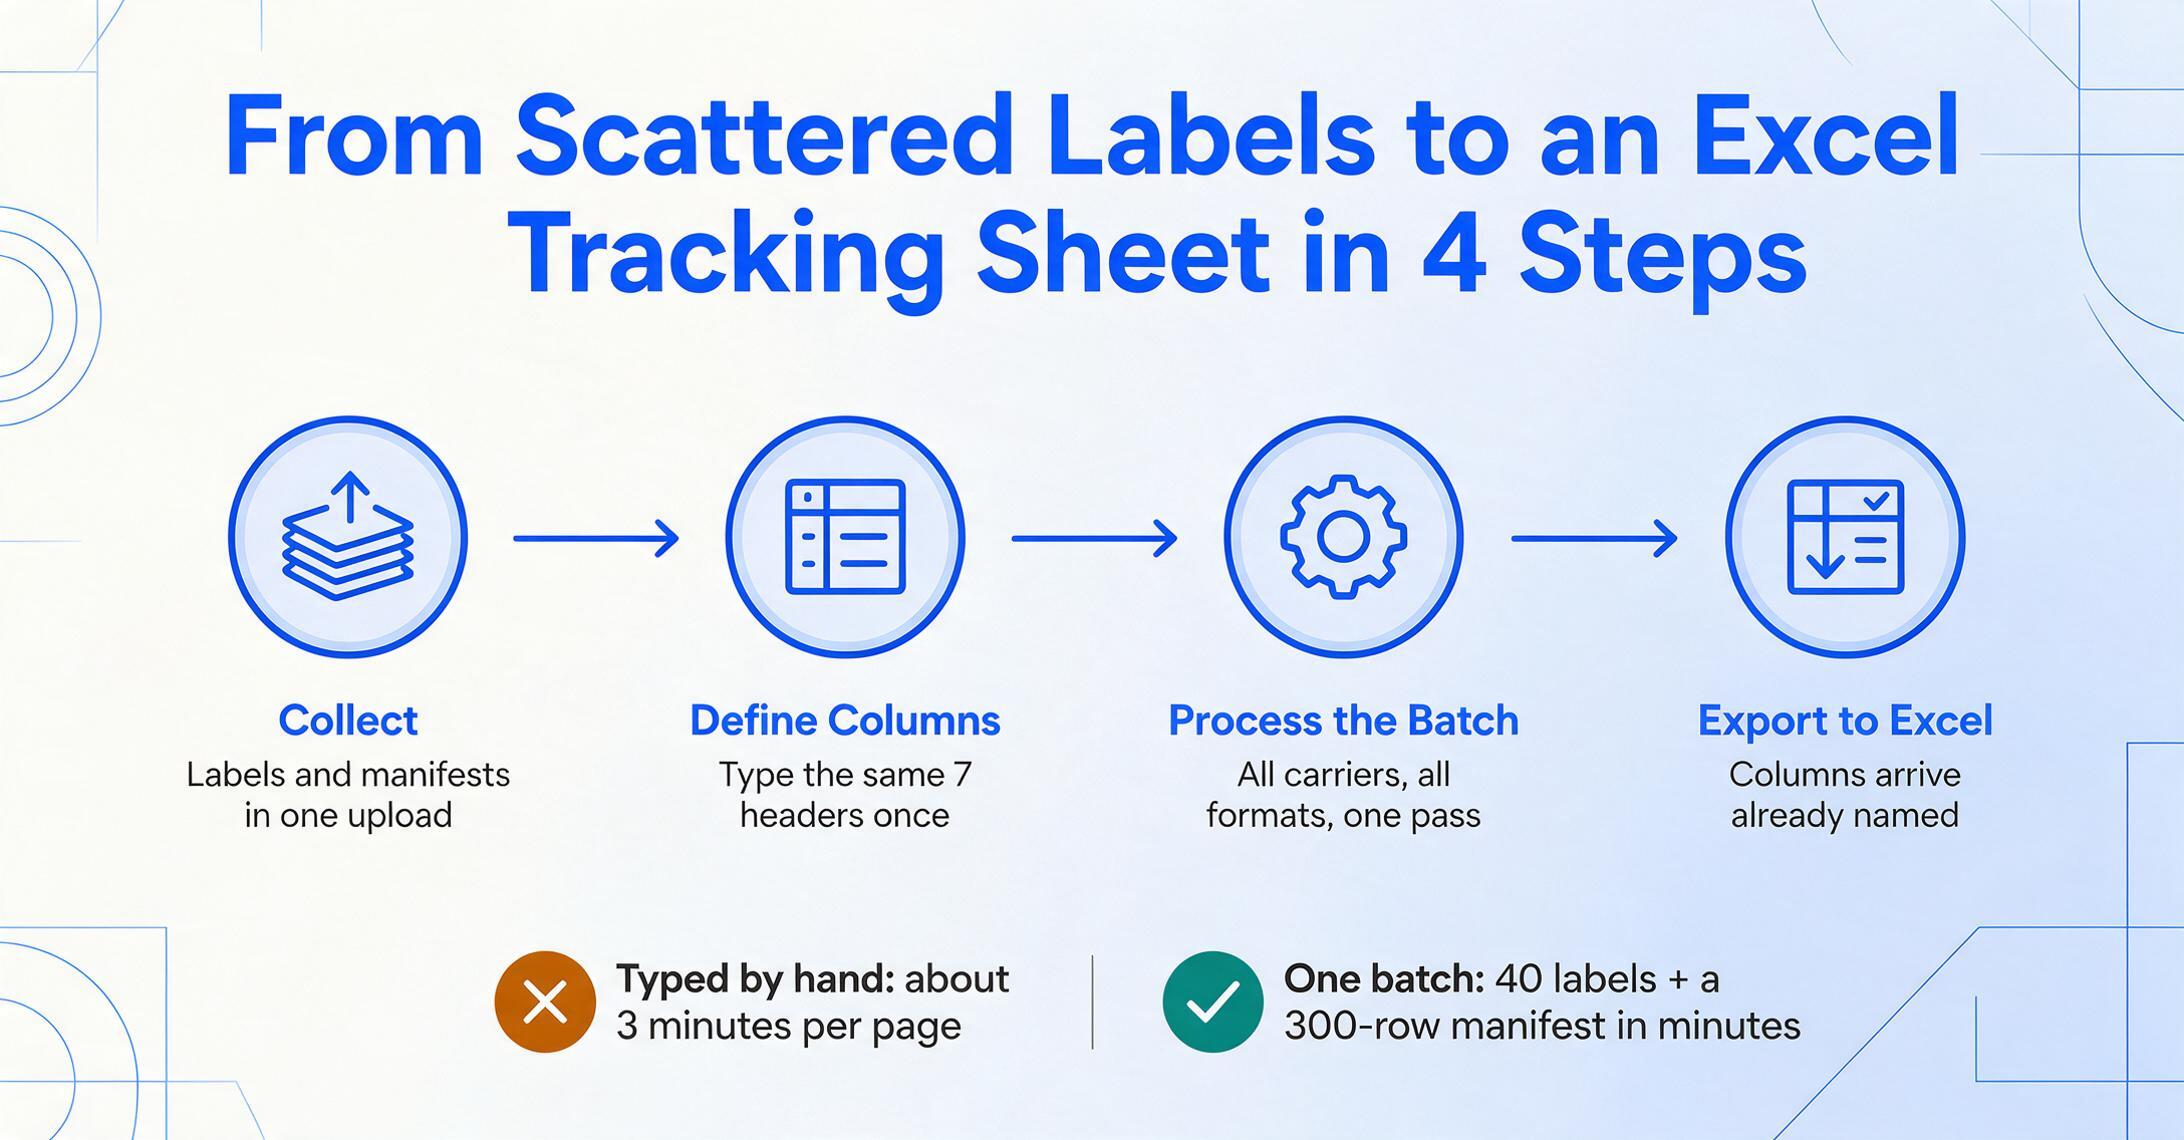
ImageToTable.ai uses Custom Column Extraction: instead of training a template or drawing bounding boxes around fields, you type the column names you want — the same headers that will appear in your spreadsheet — and the AI locates the matching values anywhere on the document by understanding what each field means, not where it sits. A FedEx Ground label, a UPS Air label, and a USPS manifest table all map to the same column list with zero per-carrier configuration. Here's the workflow a logistics coordinator actually runs:
Collect everything — labels and manifests together.
Drag the week's label PDFs (or photos of labels from the dock), the USPS drop-ship manifest, and any freight manifest into one upload. No sorting by carrier, no separating document types — mixed batches are fine. The system reads PDFs, scanned images, and phone photos alike.
Define your tracking columns once.
Enter the headers from the table above: Tracking Number, Carrier, Service Level, Ship Date, Weight, Recipient, Reference. These names become the exact column headers in your exported Excel file.
Process the batch — all carriers, all formats, one pass.
The AI reads every label and every manifest row, finds the values matching your column definitions, and fills the output table. A 40-label batch plus a 300-row manifest completes in minutes — compare that to roughly 3 minutes of manual entry per page, which is what the same data costs a human typist.
Export to Excel — and set the tracking column to Text.
Download the merged table as XLSX. Before doing anything else with it, select the Tracking Number column and set the cell format to Text — otherwise Excel displays long numeric tracking numbers in scientific notation (a 22-digit USPS number turns into something like 9.4E+21), which looks wrong and breaks carrier lookups that expect the exact string.
Extraction replaces the typing, but the Text-format step is non-negotiable — it's the difference between a spreadsheet that looks right and one that actually works in carrier portals. ShipWorks' own support documentation for importing tracking numbers into Excel covers exactly this: set the column format to Text during import, before the numbers are reinterpreted.
Files are processed securely and not stored.
Reading Tracking Numbers Across Carriers
Once the numbers are in the spreadsheet, they're only useful if they're correct — and the fastest correctness check costs nothing: carrier tracking numbers follow recognizable, carrier-specific formats. A tracking number is not a random string; the prefix encodes the carrier and, in some cases, the service.
| Carrier | Typical format | What to verify |
|---|---|---|
| UPS | 18 characters starting with 1Z, then a 6-character shipper number, 2-digit service code, 8-digit package ID, and a check digit | Always starts with 1Z on standard labels; 11-digit numeric and T-prefixed formats also exist. |
| FedEx Express | 12 digits, numeric only | All numeric — a letter in the string means a transcription error. |
| FedEx Ground | 15 digits, often starting with 96, 02, 03, or 04 | Confusable with Express; length and prefix are the differentiators. |
| USPS Priority / First-Class | 22 digits starting with 9400, 9205, or 9407 | Numeric only; if the number is 20 digits starting 9407, it's Certified Mail. |
| USPS Priority Mail Express | 13 characters, e.g. EA123456789US | Two letters + nine digits + two letters — contains letters by design, don't "fix" them. |
| DHL Express | 10 digits | Short numeric; also appears on air waybills as a longer number. |
| Amazon | TBA followed by 12 digits | Seen on FBA shipments; the TBA prefix is the format's signature. |
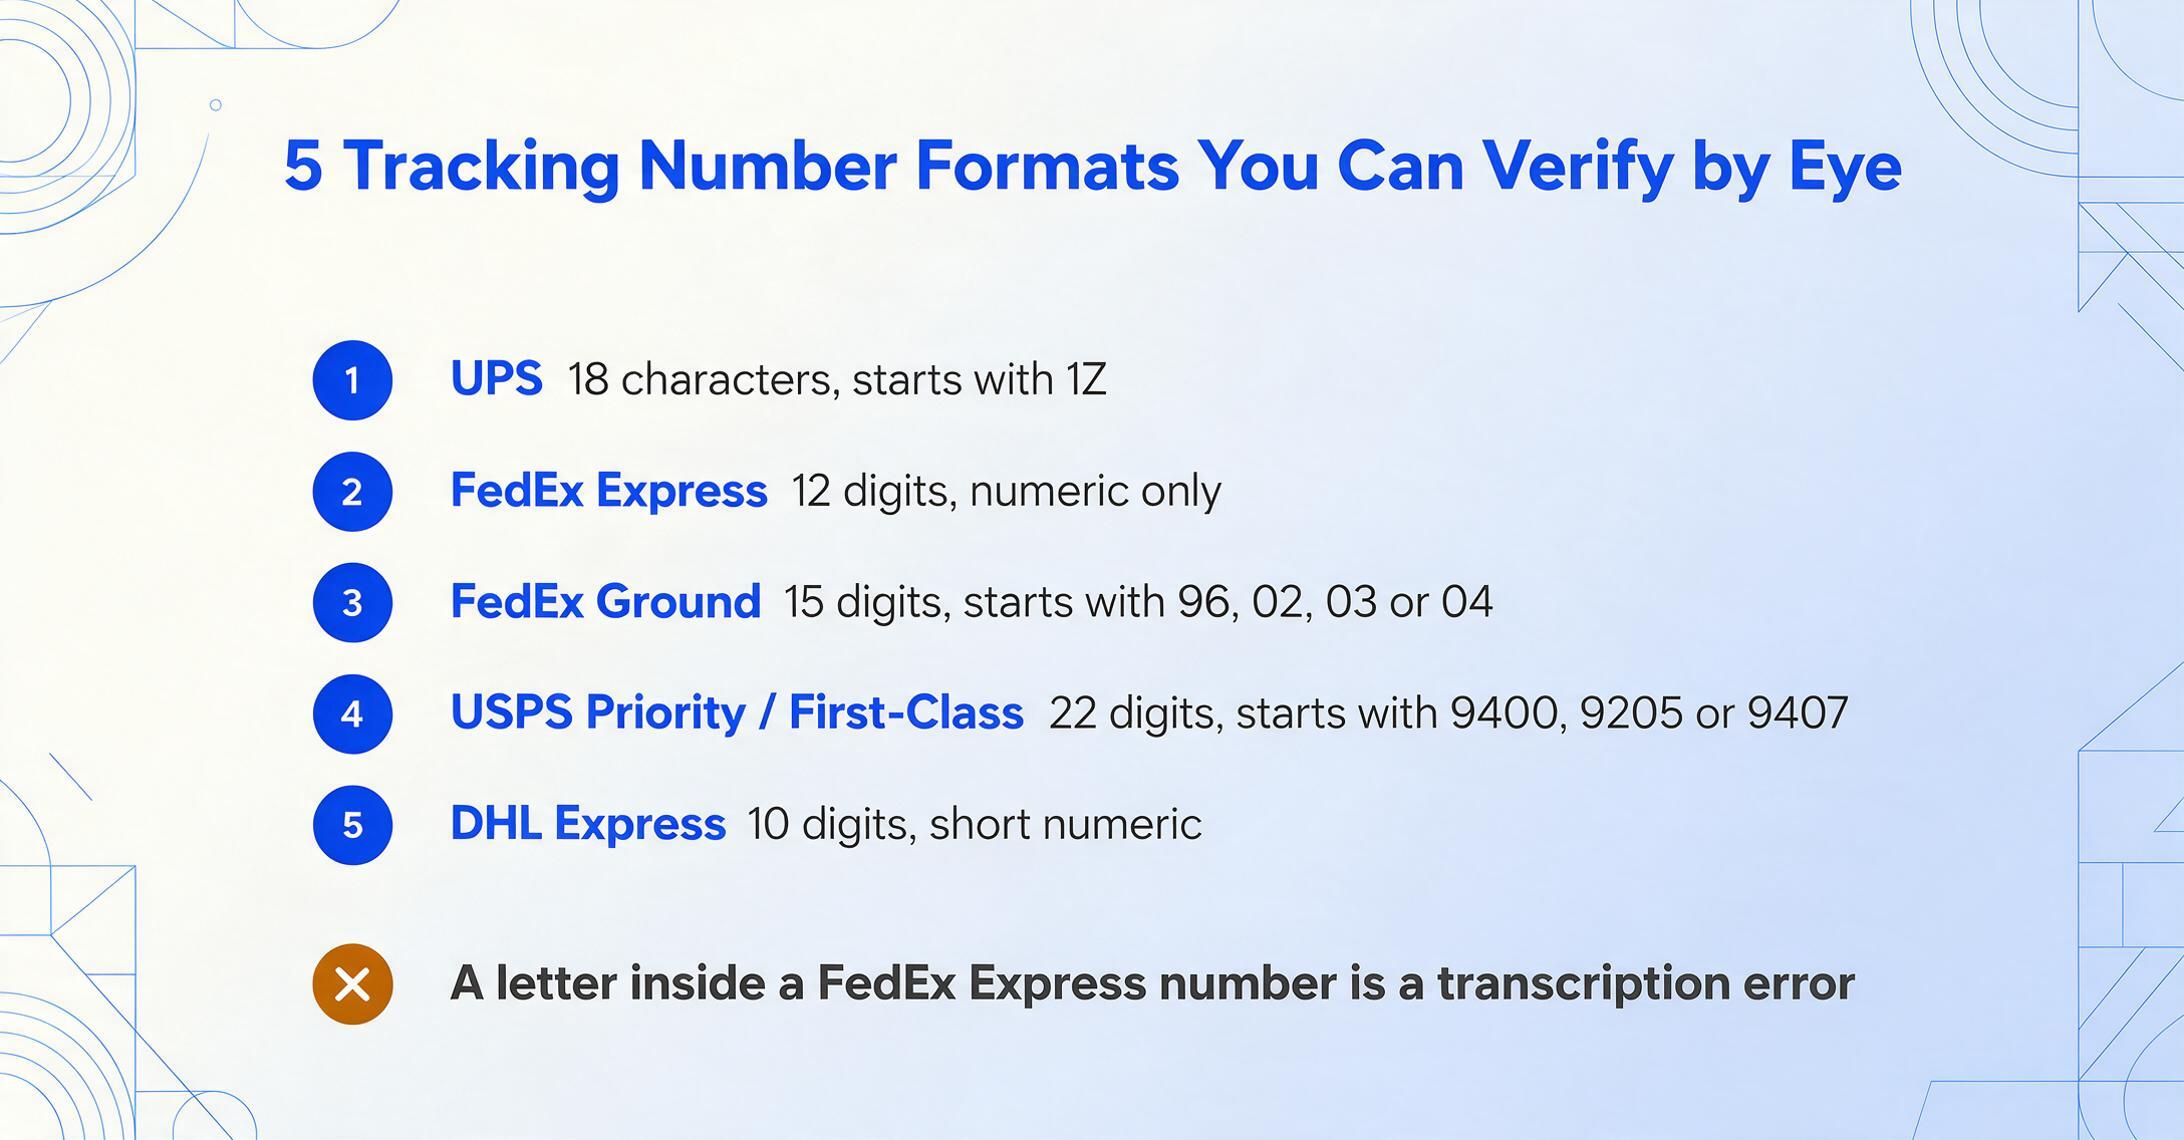
These patterns are documented independently — the structure of the UPS 1Z number is covered in detail on Wikipedia's tracking number article. Using them as a validation pass after extraction catches the failures that matter: a 21-digit "USPS" number, a letter inside a FedEx string, a 1Z that starts with anything else. When you process a batch of labels from multiple carriers at once, this cross-check is where the format knowledge pays off — the same verification that a clerk would do by instinct on a familiar label, now applied uniformly to every row.
For inbound freight, the same principle extends to bill of lading numbers, which follow their own conventions per carrier and mode. If your tracking table spans LTL and parcel together, see how to batch-process bills of lading across multiple carriers into one spreadsheet — the same column-definition approach applies to BOLs, with PRO numbers and BOL references replacing parcel tracking numbers. If your flow is simpler — a handful of BOLs per month — the direct bill of lading to Excel route covers it without the batch overhead.
From Extracted Rows to a Live Tracking View
A spreadsheet full of tracking numbers is a shipping log; it becomes a tracking log when you add the status column and start using it to drive decisions. With the rows in place, three spreadsheet moves complete the job:
- Add a Status column and keep it current. For small volumes (under a few dozen), check the handful of non-delivered packages in the carrier portals once a day and update the cell. For larger volumes, use the carrier's bulk tracking feature or an import-based status tool, then paste the results back. The key is that status lives beside the extracted data, in the same row, so filters work on the whole table.
- Build a pivot table by carrier and service level. Rows: carrier. Columns: status. Values: count. That single pivot answers "which carrier is underperforming this week" and "how many packages are still in transit" without scrolling through rows.
- Flag exceptions with conditional formatting. Highlight anything older than its expected delivery window — the rows where a package should have arrived and hasn't. These are the ones that become customer-support cases if nobody catches them first.
This is also where shipping software enters the picture. Platforms like ShipStation (label printing and tracking across 200+ carriers), ShipBob (3PL fulfillment), and freight-focused systems like FreightPOP, Freightview, or enterprise Descartes products all generate their own tracking views — but they generate them from the same underlying data, and many teams still reconcile them against a spreadsheet that merges data from sources the software doesn't cover, like a second warehouse's handwritten labels or a carrier that isn't integrated. Extraction fills the spreadsheet side of that hybrid workflow: the rows arrive complete, and the software's own exports become a cross-check rather than the only record.
For teams operating at shipping-log scale rather than order-management scale, the spreadsheet remains the simplest destination — and the same batch approach extends from tracking to freight invoice processing, where extracted weights and reference numbers reconcile against carrier billing.
Manifest Scale: When It's Not Just a Few Labels
The workflow above scales to exactly where manual entry breaks. A USPS drop-ship manifest or a freight carrier's manifest can list hundreds of pieces on a handful of pages — and because the carrier generated it from its own system, the fields are uniform and tabular, which makes them the easiest document type for extraction. One manifest, processed as a single file, produces the entire day's tracking rows at once.
Freight manifests add fields parcel labels don't carry: container and seal IDs for ocean cargo, gross mass, commodity codes, and package types. Those fields exist because the manifest is the document customs and receiving teams reconcile against — the weight and piece count on the manifest should match the packing list and the bill of lading, and when they don't, someone needs the manifest data in a comparable format to find out where the discrepancy is. That reconciliation workflow — matching an incoming shipment's manifest numbers against the receiving side of your own records — is covered in depth in our guide to BOL receiving and PO matching at volume.
The USPS rules for manifesting are public and precise: the Domestic Mail Manual (section 705) and Publication 401 define the itemized and batch manifest formats, the per-piece ID and weight requirements, and the postage statement that closes the document — the authoritative reference is the USPS Manifest Mailing Systems overview. The practical takeaway for your spreadsheet is that manifests are heavily standardized, which is exactly why they extract cleanly: the carrier has already structured the data for you, and the extraction step just reads it into rows.
If you're still evaluating whether a dedicated extraction workflow is worth building at all, the roundup of logistics document extraction tools tested in 2026 compares the approaches side by side — template-based, AI-based, and hybrid — against the exact document types this article covers.
FAQ
Can I extract data from photos of shipping labels, or do I need PDFs?
Both work. Labels photographed with a phone — including from a warehouse dock — extract with the same column definitions as label PDFs. Printed fields like tracking numbers and addresses are the most reliable; handwritten weight annotations are the least, so verify those if a label was filled in by hand.
Does extraction handle multiple carriers in the same batch?
Yes. Because extraction is semantic rather than template-based, a FedEx Ground label, a UPS Air label, and a USPS manifest can be processed in one batch with one shared column list. Each row is tagged with the values that match your columns regardless of how each carrier laid out the document.
Why do my tracking numbers show up as scientific notation in Excel?
Excel converts long numeric strings to scientific notation when the cell format is General. Select the Tracking Number column and set the format to Text before pasting or importing. With an extracted spreadsheet, do it immediately after export — the extracted values are exact strings, and Text format preserves them.
What's the difference between a shipping label and a shipping manifest?
A shipping label is the per-package document carrying one box's tracking number, addresses, and weight. A shipping manifest is the batch document listing every piece tendered in a single drop-off, with piece IDs, weights, and postage in tabular form. Both feed the same tracking spreadsheet — labels one row at a time, manifests many rows per file.
Can the spreadsheet update tracking status automatically?
Not from extraction alone — extraction reads documents; carrier status lives in carrier systems. The standard workflow is to extract the tracking numbers, then use the carrier's bulk status lookup (or a status import) to refresh the Status column. Extraction's job is making sure the numbers in the spreadsheet are correct to begin with.
How accurate is the extraction on thermal labels?
Printed tracking numbers on good-quality thermal labels extract at high accuracy, as do address blocks and service levels. Accuracy drops on faded or smudged thermal labels and on handwriting. Because tracking numbers are the field that can't be corrected later, spot-check a sample of them after each batch — the carrier format rules above make that check fast.
The Spreadsheet Is the Destination; Extraction Is Just the Missing Step
The insight that changes the workflow is simple: the tracking spreadsheet doesn't have to be built by hand, because every field it needs already exists on a label or a manifest. The missing step was always the transfer — and that transfer is exactly what batch extraction does, at the scale where manual entry stops being tedious and starts being unreliable.
Try it on your own documents. Upload a week's worth of labels and a manifest, define the columns above, and see what your tracking table looks like when it arrives complete — instead of after an afternoon of typing.